
Targeting Guide
Show the right experience to the right audience. A complete reference for all targeting options in Tailor.
Targeting Fundamentals
The purpose of targeting is to match a visitor's intent with the right messaging and proof. A good segmentation axis should change the story you tell. If the segment doesn't change what you'd say on the page, don't segment.
Keep It Simple
Start with one targeting axis. More rules mean more complexity and slower learning. You can always layer on additional targeting after you've validated the first axis works.
Video Guide
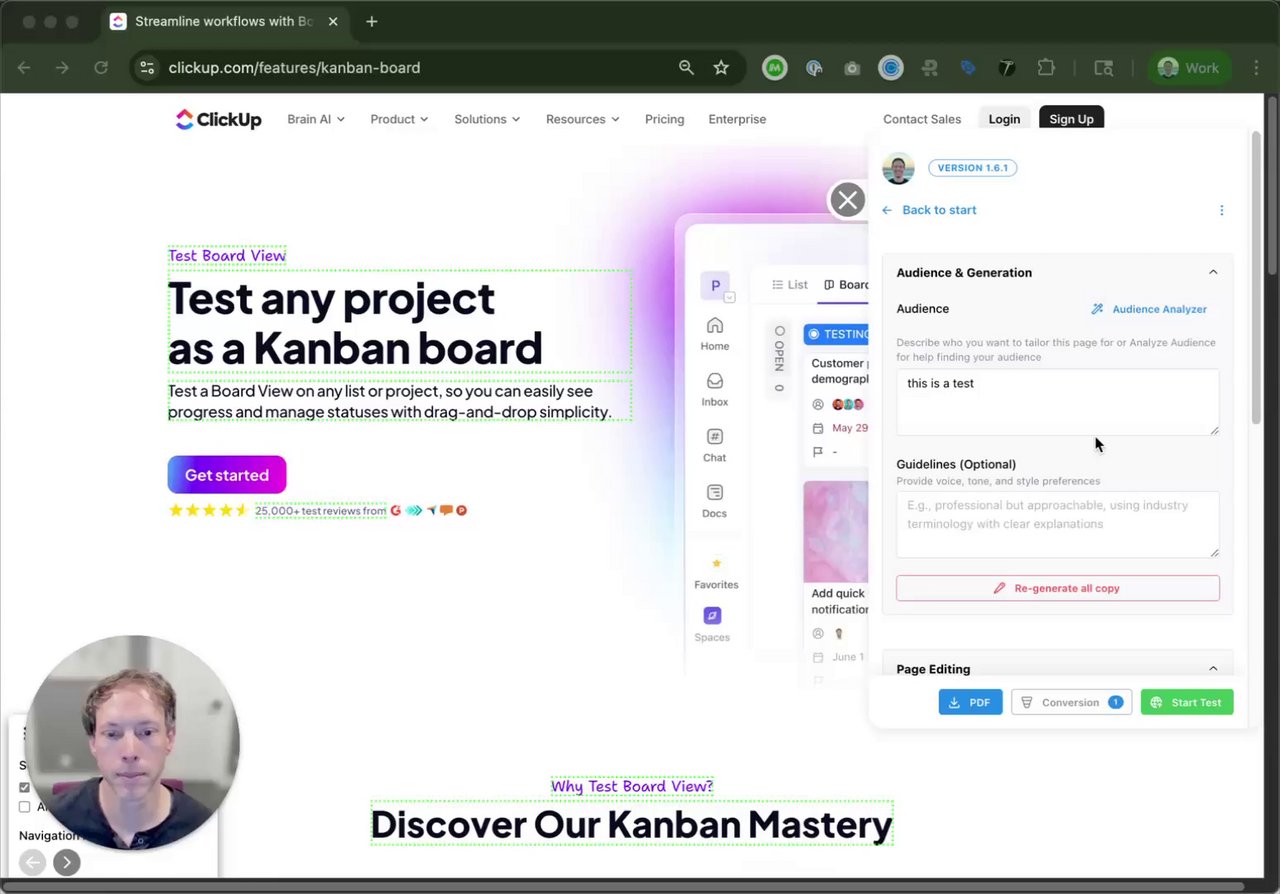
A 61-second walkthrough of targeting configuration in the Tailor extension.
UTM-Based Targeting
UTM parameters are the cleanest targeting signal for performance marketing because they're explicit and easy to debug. You can target by any combination of:
utm_sourceTraffic source (e.g. google, linkedin, facebook)utm_mediumMarketing medium (e.g. cpc, social, email)utm_campaignCampaign nameutm_contentCreative or ad variationutm_termKeyword or search termVerifying UTMs
Tailor reads UTMs directly from the landing page URL. To verify your UTMs arrive intact, check the URL in your browser after clicking the ad. If redirects or shorteners strip parameters, adjust the redirect to preserve them.
Campaign Rules: Match Several Values at Once
When you set up who should see a test, campaign rules are structured: pick a URL parameter, choose how it matches, and add one or more values. A rule matches when the parameter equals any of the values, so one test can cover several campaigns or sources without duplicating rules or writing wildcard patterns.
Wildcards are supported in the parameter name: for example utm_* matches any UTM parameter. Saved targeting reads back as plain-language value pills, so you can verify what a test targets at a glance.
Performance Max Campaigns
Performance Max has no keywords, and audience signals are suggestions Google may not follow. The asset group is the intent unit you control, so the setup is: pass the asset group to the page as a URL parameter, then target on it like any other parameter.
- Structure asset groups by intent theme, one theme per group. In each asset group's URL options, add a custom parameter, for example
{_ag}with the valuepmax-fitness-studios. There is no ValueTrack macro that inserts the asset group name automatically, so the value is hardcoded per group. Use a consistent naming scheme. - Append it with a final URL suffix, for example
utm_source=google&utm_medium=cpc&ag={_ag}. PMax URL expansion can land clicks on pages other than your final URL; a suffix is still appended to expanded URLs, while parameters hardcoded into the final URL are not. Turning URL expansion off is also a valid choice if you want full landing page control. - In Tailor, create campaign rules on the
agparameter, one variant set per asset group theme. Mechanically identical to UTM targeting, including wildcard and multi-value rules. - Layer geo, device, and IP enrichment on top. One asset group spans hot Search intent and colder Display and YouTube placements, and network-level ValueTrack macros are unreliable in PMax. For B2B, enrichment is often the strongest signal on PMax traffic because the keyword is missing.
Verify before scaling
Check the Performance Max landing page report for the URLs actually receiving clicks, and Tailor's traffic view filtered by your parameter, before building the full variant set. Expect per-asset-group tailoring to be coarser than per-keyword tailoring on Search.
Restricting to Paid Traffic Only
To show tailored experiences only to paid visitors, target by utm_source or utm_medium. For example, set utm_medium = cpc to only personalize for paid search traffic. Organic, direct, and referral visitors will see the original page.
Geo, Device & Language
Beyond UTMs, Tailor supports targeting by:
Device
Mobile, desktop, or tablet. Useful for showing different CTAs or layouts by device type.
Language
Browser language. Show localized content to visitors based on their language preferences.
Geography
IP-inferred location (coarse). Note that VPN users may appear from a different location.
When possible, lean on higher-intent signals (UTMs, keyword, ad context) for targeting, and use device/geo/language as secondary filters.
New vs. Returning Visitors
Show a tailored page only to first-time visitors, or only to returning visitors coming back a day or more later. Useful for first-visit offers, or for showing returning prospects the next step instead of the same pitch.
The targeting card shows how much returning traffic the page actually gets and warns you if the returning audience is too small to support a test. If your site passes a user ID to the on-page script, returning visitors are recognized across browsers and devices too.
Custom Signals
Define your own yes/no visitor signals and target by them like any built-in signal. For example, a "Logged in" signal lets you show different messaging to visitors who already have an account.
Define the signal
Go to Settings → Visitor Intelligence and create the signal as a yes/no condition.
Use it in targeting
In a test's Advanced Targeting, your signals appear under a Custom group. Pick Yes or No. The "who sees this" summary shows them alongside built-in signals, including in the pre-launch confirmation.
IP Enrichment (Firmographic Data)
IP enrichment identifies the company behind a visitor's IP address and returns firmographic attributes. It answers "what kind of account is visiting?" rather than "who is this person?"
Available Attributes
How to Use Enrichment Data Effectively
Enrichment data is probabilistic and may not match perfectly for individual visitors on VPNs or shared networks. It works best for segment-level targeting ("show enterprise messaging to enterprise-sized companies") rather than individual-level decisions. Treat enrichment as context for tailoring the experience, not as identity.
For setup instructions and privacy details, see the Visitor Identification guide.
Privacy & Consent
IP enrichment does not require cookies. The IP address is available at the network layer and is processed transiently to derive company-level attributes. However, you should still align enrichment with your consent policy and honor Do Not Track (DNT) and consent mode preferences where applicable.
Page & Path Scoping
Tailor doesn't run on every page by default. Tailored pages are explicitly attached to specific URL paths. Only the pages you configure are affected. Everything else stays untouched. There's no need for blanket exclusion rules.
A test's page scope is normally the single page you built it on. It can also be a set of pages that share a path, which is how one test covers a whole landing page directory or every location page. See Running one test across many pages.
Running One Test Across Many Pages
Some tests belong to a set of pages, not to one page. A nav change across 500 location pages, a proof bar across every /lp/ landing page, a pricing module across a whole section. Set up one page at a time, each of those becomes its own test on its own slice of traffic, and individually thin pages rarely collect enough visitors to read a lift.
Instead, give one test a page scope: the set of pages it runs on. Every page in the scope serves the same change, and their traffic pools into a single result. That is often the difference between a readable test and one that never reaches significance.
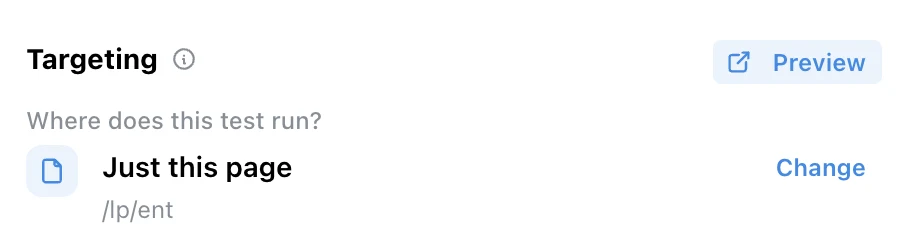
Every test already has a page scope. Until you change it, the scope is the single page you built the test on.
Widening the scope
Open the test on a page that represents the set
Build the test on one real page, the way you always do. In Targeting, the first question is Where does this test run? Press Change to widen it.
Pick how wide to go
Tailor offers the scopes available from the page you are on, narrowest first. From /lp/ent, for example:
Just this pageThe page you built the test on. The default./lp/*Every landing page./*Every page on the site.The rungs follow the page's own path, so a deeper page offers more of them. From /lp/ent/pricing you would also see /lp/ent/*, every enterprise landing page.
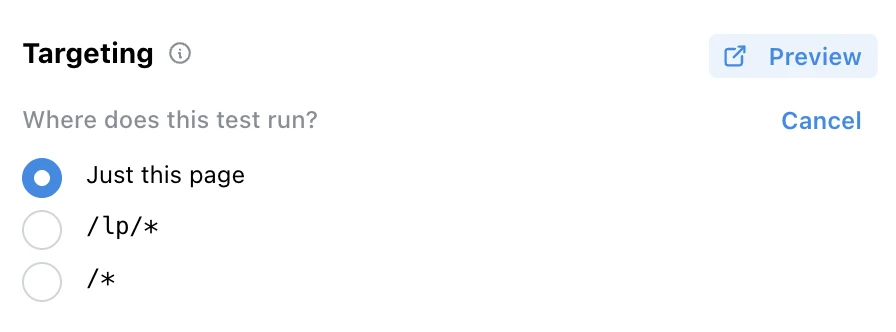
Change replaces the answer with the scopes available from this page. Each one shows its page count as soon as Tailor can read your page list.
Check the pages before you launch
Each scope shows how many pages it covers, and the count opens the list of those pages so you can scan or search them and open any one to look. Counts are drawn from your sitemap plus the pages Tailor has seen traffic on, so parameterized pages that never appear in a sitemap are still counted. Once the test is live, the scope shows in the tests list and on the test's dashboard in place of a single URL.
How a scope matches
The * covers everything below it
It spans slashes, so /lp/* covers /lp/ent and /lp/ent/pricing alike. Pick the level you mean and stop there.
One site, not many
The domain is always literal. A test can span hundreds of pages on one site, but never spans two sites or two subdomains.
Query strings pass through
A scope describes paths, so ad parameters on the URL do not change whether a page is in scope. Which visitors join is a separate question.
Scope and audience combine
The scope picks the pages, the targeting rules pick the visitors. A /lp/* scope with a utm_source = google rule runs across every landing page, for paid Google visitors only. That combination is most of what a multi-page test is for.
Choosing what to change
Changes are anchored to elements, so they apply on every page in scope that has the element and are simply absent on pages that don't. That makes shared furniture (nav, footer, hero band, CTA row, pricing module) the natural material for a multi-page test, and a headline unique to one page the wrong material.
You can open and edit the test from any page it covers, not only the page you built it on. When you do, the editor flags any change whose element isn't on the page in front of you as not on this page. That change still applies where the element exists. It is worth reading before you add the same change a second time.
Set the scope before you launch
The scope locks while a test is live. Widening or narrowing it mid-test would change who is in the test and mix two different audiences into one result. To change it, stop the test, set the new scope, and start it again. Multi-page scopes are also not available on tests that redirect before the page loads, since a redirect resolves one source page.
Results arrive as one read for the whole scope. There is no per-page breakdown, so when you need to know how a change landed on one page in particular, give that page its own test.
Multiple Experiments on the Same Page
You can run multiple experiments on the same URL as long as they have unique trigger combinations. Tailor resolves conflicts automatically: more specific rules take precedence. You can also manually set priorities to control which experiment wins when rules overlap.
The same rule settles a page-specific test against a broader one. A test scoped to the exact page beats a test scoped to a path, and between two paths the one that pins down more of the URL wins. So a site-wide test steps aside on the pages that have a test of their own, and resumes everywhere else. Priorities you set by hand still come first.
Always test with preview mode to verify the correct variant is served for each targeting combination.
Excluding Internal Traffic
Internal traffic is included in experiment results. For most sites, this is a negligible percentage of total volume and does not materially affect results. If internal traffic is significant for your use case, reach out to support [at] tailorhq [dot] ai and we can discuss options.