Visitor Identification
Know who's behind your traffic, and decide what to do about it.
Visitor identification is optional. Tailor works without it. Turn it on when you want to see which companies and roles are visiting, or to personalize by segment.
Overview
Visitor Identification lets you see which companies (and what types of roles) are visiting your site. You can use it purely for intelligence (Passive Mode) or to power personalization and experiments (Targeting Mode). You control when it observes and when it acts.
What It Unlocks for Performance Marketers
- Break down conversion rate by company size, industry, or role
- See whether enterprise traffic converts differently than SMB (e.g., enterprise converts 2× better)
- Identify high-value segments that aren't converting
- Validate whether paid traffic matches your ICP
- Prioritize outbound based on real engagement
- Personalize messaging by segment, when ready
It turns "traffic" into structured signal.
Two Ways to Use It
Passive Mode
Observe without changing content. No dynamic content, no A/B tests, no messaging swaps, no user-visible impact. You're building intelligence.
Best For
- Understanding who's actually visiting
- Diagnosing conversion gaps
- Segment-level funnel analysis
- Building confidence before personalizing
Targeting Mode
Turn identified segments into controlled personalization. Once enabled, identified attributes can power targeting rules. Targeting is optional. You decide when to use it.
You Can
- Show enterprise messaging to enterprise visitors
- Swap case studies by industry
- Adjust CTAs for decision-makers
- Run A/B tests by company size or role
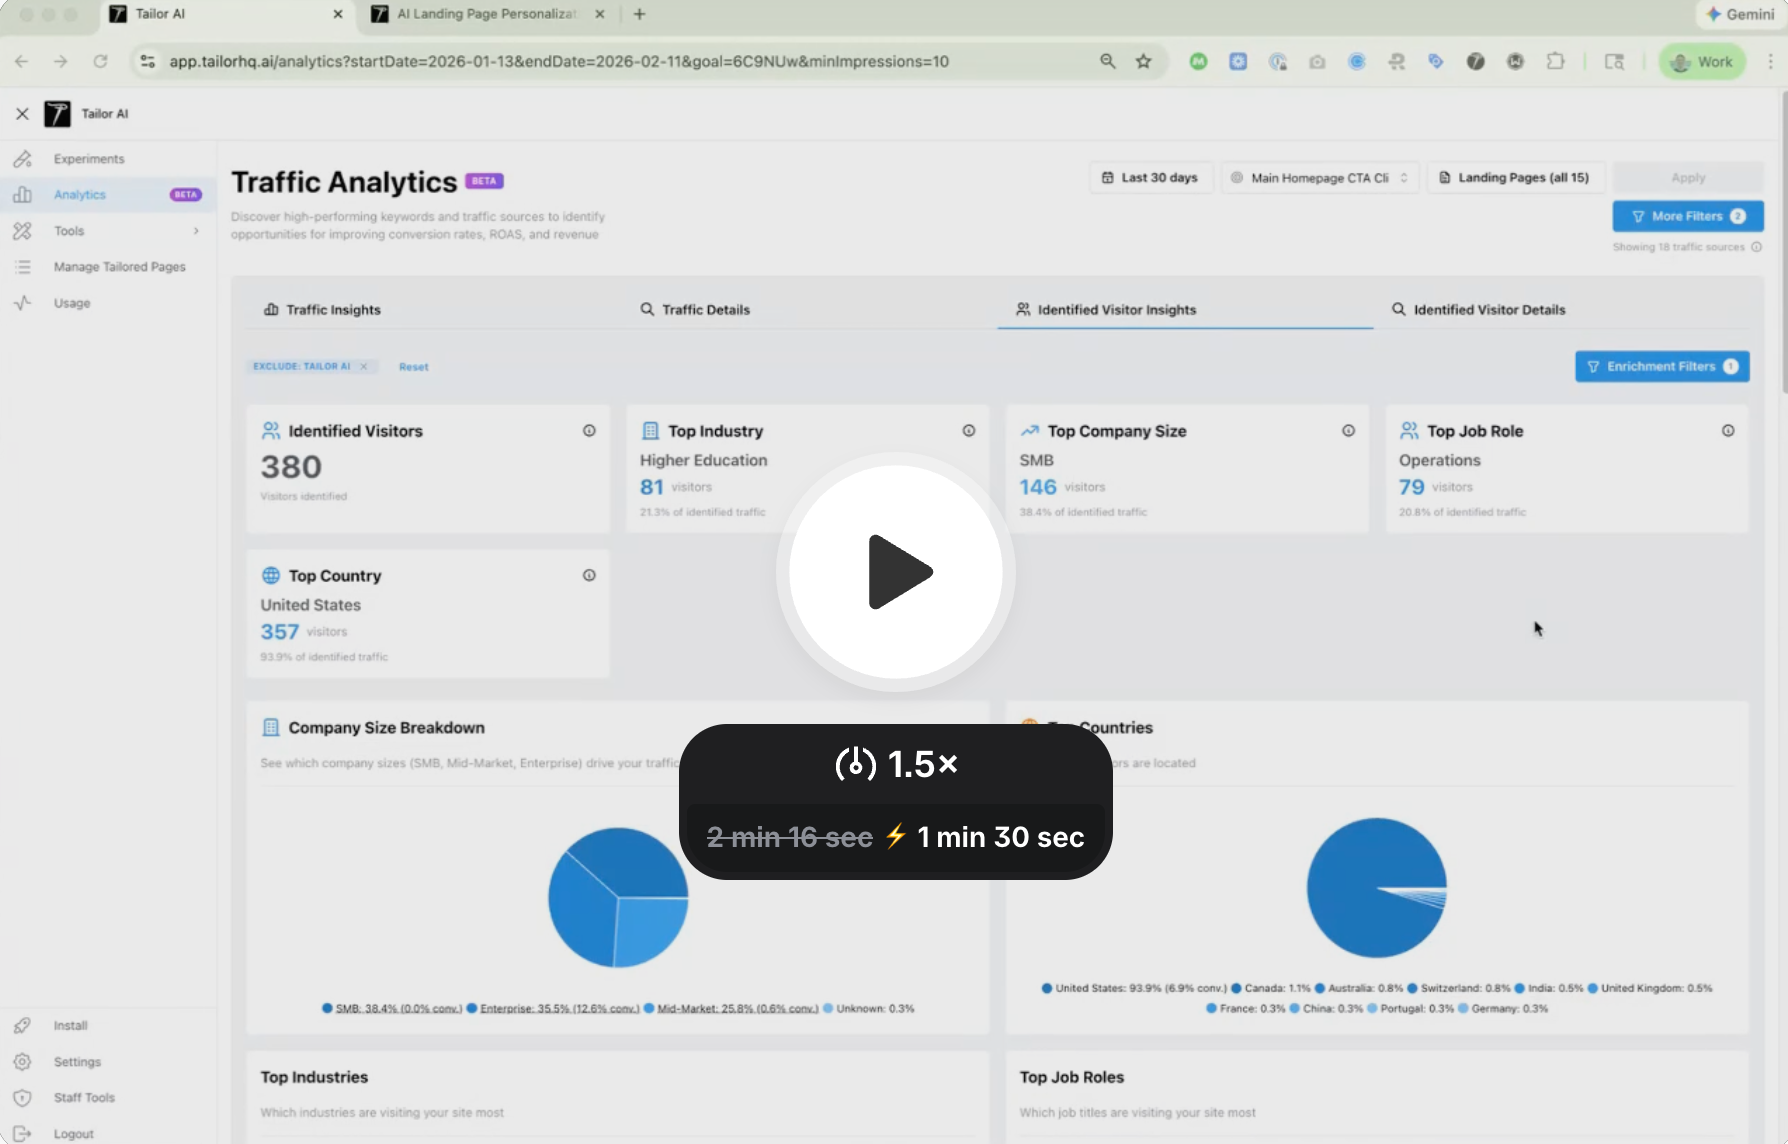
See It in Action
See how identified segments appear inside Traffic Analytics and how to target a tailored page based on these segments.
Setup & Details
Open Settings
Navigate to app.tailorhq.ai/settings and go to "Visitor Identification".
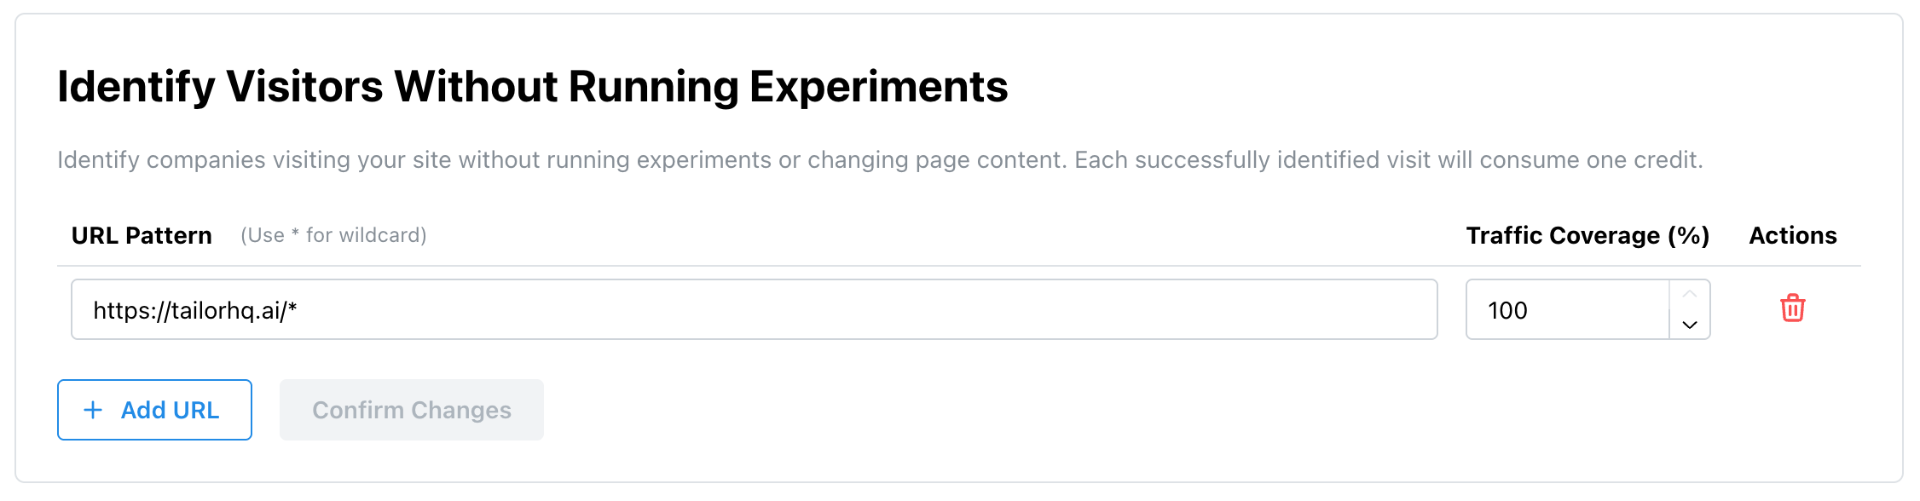
Choose Where to Identify Visitors
You can enable visitor identification wherever the Tailor tag is installed with a single settings toggle.
Need more control? You can also specify individual URL patterns (e.g. https://yoursite.com/pricing or https://yoursite.com/blog/*) to limit identification to specific pages.
Set Traffic Coverage
Choose what percentage of matching traffic to identify (1–100%). Each identified visit consumes one credit.
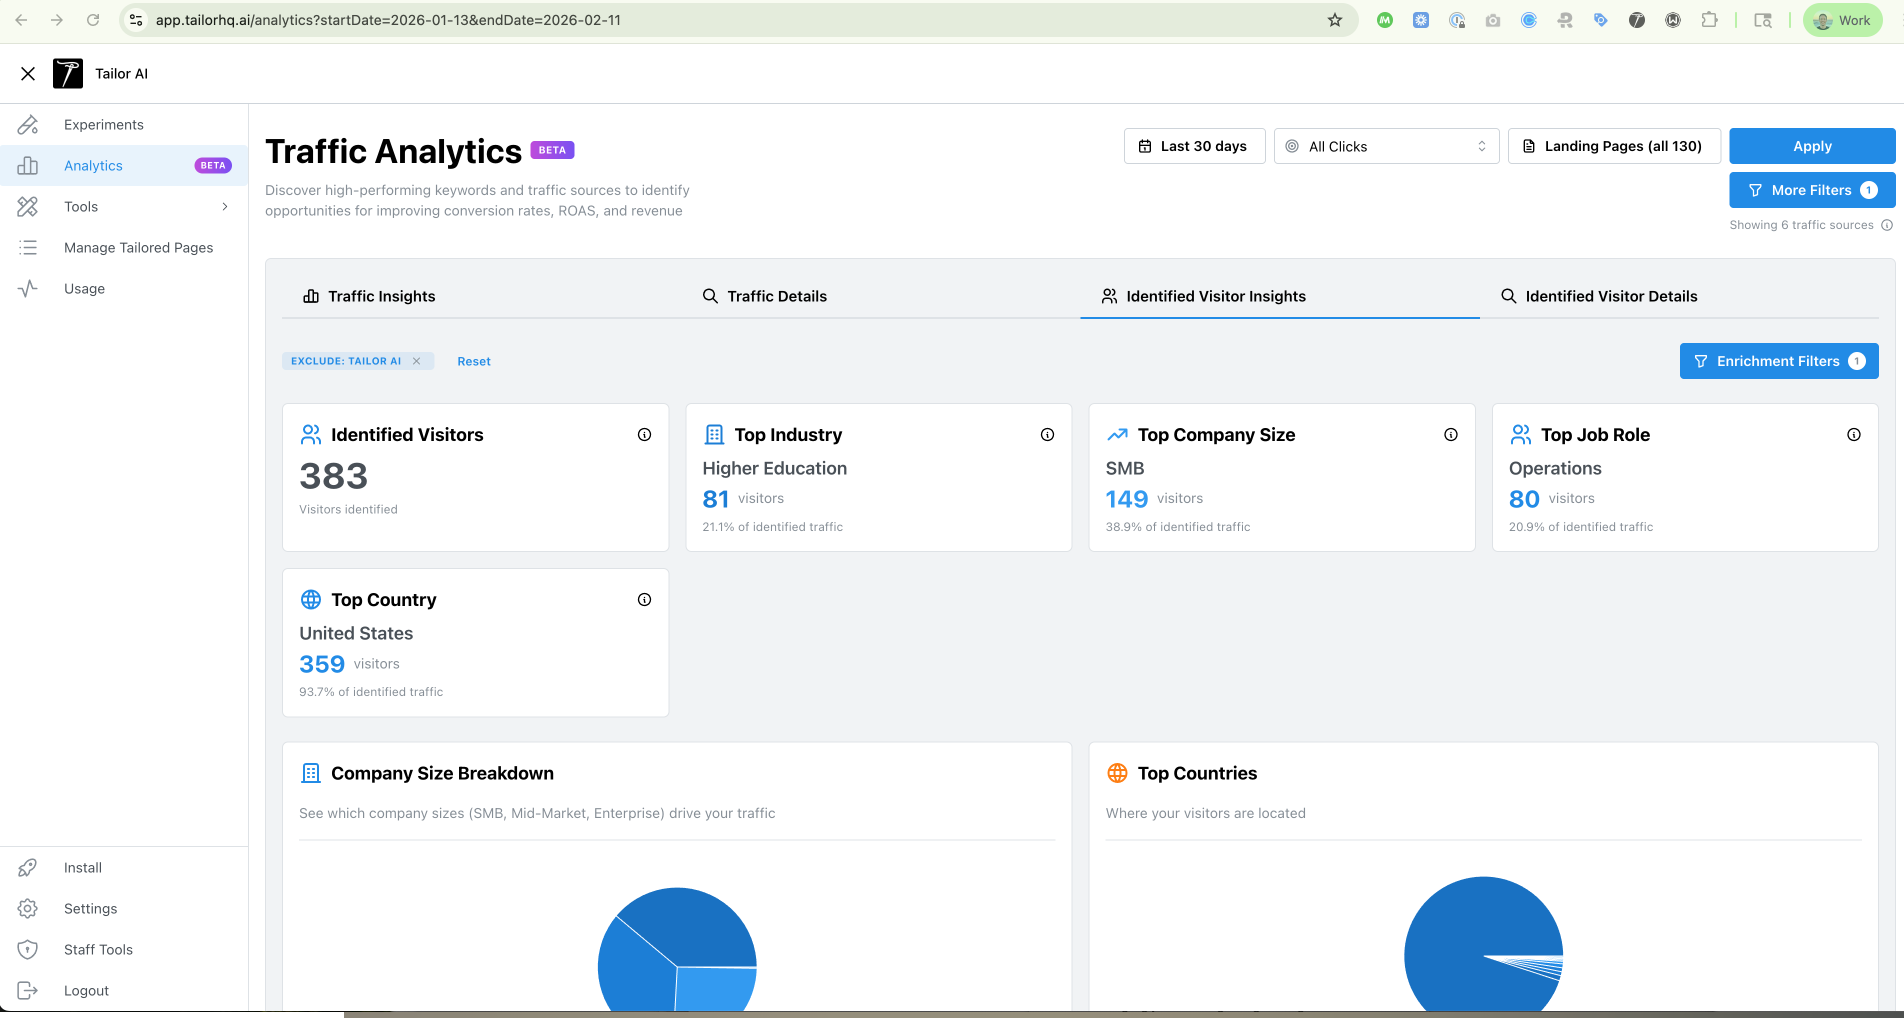
What Happens After Activation
Identified data appears under Analytics → Identified Visitor Insights. You'll see breakdowns by:
Firmographics
Industry, company size, organizational type.
Role Signals
Probabilistic department and seniority signals.
Context
Geography and other traffic attributes.
From there you can compare conversion rate across segments, identify high-performing or underperforming audiences, validate targeting assumptions, and inform personalization strategy.
Filter Identified Visitors
In the Identified Visitors dashboard, use filters to focus on the traffic that matters. Combine filters, save them as a view, and reuse the view for reporting and Slack alerts.
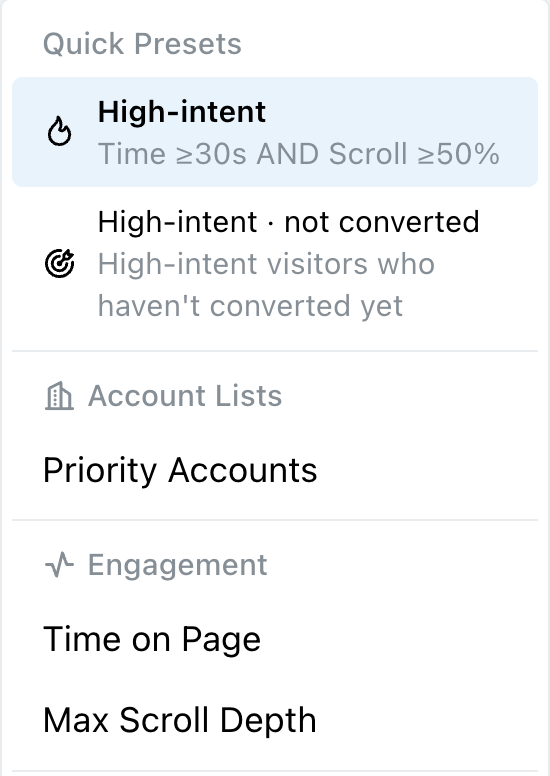
Quick Presets
One-click segments like High-intent (Time ≥30s AND Scroll ≥50%) and High-intent, not converted to jump straight to the visitors most worth your attention.
Account Lists
Filter to visitors from companies on any Account List (for example, Priority Accounts). Reuse the same lists across reporting, alerts, and experiment targeting.
Engagement
Filter by Time on Page and Max Scroll Depth to isolate visitors who actually read the page, not just bounced.
Company
Industry, Company Name, Company Size, and Revenue for firmographic slicing.
Location
Country and Region. Useful for regionalized campaigns or pipeline ownership.
Job
Probabilistic department and seniority signals to focus on decision-maker traffic.
Slack Alerts
Get notified in Slack when identified visitors match a saved view. Alerts inherit that view's filters, so a view scoped to Priority Accounts + High-intent only pings the channel on matching visits.
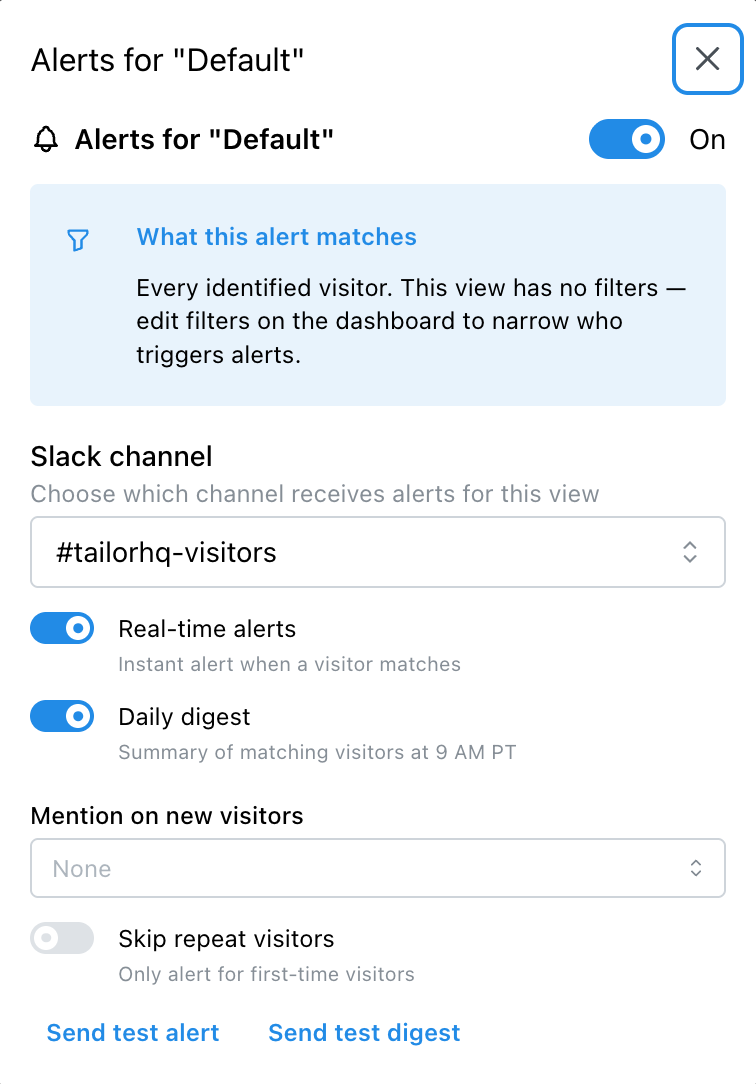
Slack channel
Pick the channel each view's alerts post to. Different views can route to different channels, so exec-facing alerts and SDR alerts don't collide.
Real-time alerts
Instant notification the moment a visitor matches. Best for small, high-signal views like target accounts.
Daily digest
A 9 AM PT summary of matching visitors from the prior 24 hours. Good for broader views where real-time would be noisy.
Mention on new visitors
Optionally @mention a user or group when a first-time visitor matches, so the right rep sees it without watching the channel.
Skip repeat visitors
Only alert the first time a visitor matches. Cuts noise when the same account browses frequently.
Send test alert / test digest
Fire a sample alert or digest on demand so you can confirm routing, formatting, and mentions before real traffic arrives.
Why Separate Observation from Personalization?
- Measure before acting. Validate segment opportunity first
- Reduce experimentation risk with data-backed targeting
- Stay aligned with consent boundaries
Need help? Reach out at support [at] tailorhq [dot] ai . We're happy to assist with setup.